
10 INSANELY Easy Science Fair Ideas For Kids
- Science Fair Wiz

- Jul 7, 2018
- 8 min read
Updated: Aug 2, 2018
10 Easy Science Fair Ideas For Kids. It's mind-boggling how simple and straight forward these are!

1. Colorful Celery? Does Water Influence Celery Color?
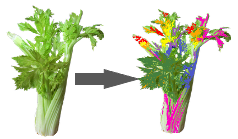
The tube that transport water in the plant is called the Xylem. It’s job is to carry water and dissolved nutrients from the roots to the rest of the plant. In this experiment, we want to test how water influences celery. (You most likely wont get the result from the pic because the image was edited to look fun and colorful. You will get colorful celery, but it wont look like it came out of a pop art magazine..)
Materials
1. 3 glasses
2. Tap water
3. 2 different colors of food dye
4. 3 stocks of celery (with leaves)
5. A knife
Experimental Procedure
1. Fill all three glasses half way with water
2. Put 10 drops of food dye in one of the glasses and mix in (you can check how much food dye is on amazon here https://amzn.to/2lXv6tt)
3. Now with a different color, put 10 drops of food dye in a second glass and mix in. You should now have 2 colored glasses of water and one left as is.
4. Cut the ends of all three stocks of celery with a knife
5. Place a stock of celery in each glass of water
6. Let the sit in the water for a couple of days
2. Bobbing Grapes- A Simple Bouyancy Experiment
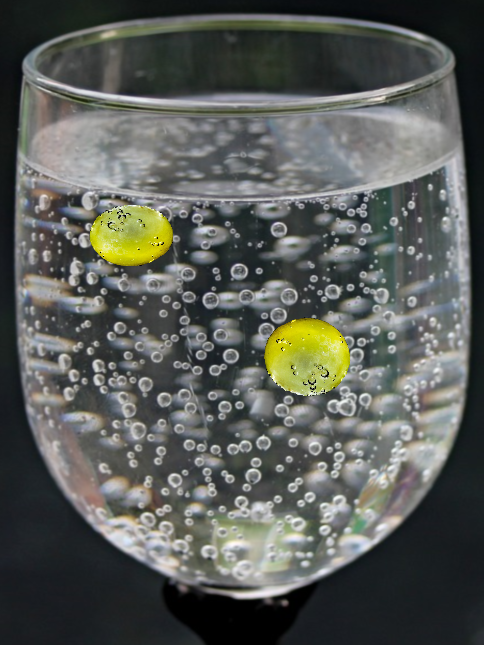
This experiment demonstrates the idea of buoyancy, the upward force on objects in fluid. We want to test how the buoyancy of grapes can change in a fluid and how the bubbles that carbonated water forms around grapes affect buoyancy.
Materials
1. A tall glass
3. Grapes (3-5 is enough)
Experimental Procedure
1. Fill a tall glass with carbonated water
2. Drop 3-5 grapes in the water, one at a time
3.Testing Geotropism With Bean Plants- The Way To Grow

In this experiment, we want to test the idea of geotropism in action. We want to figure out how plants know which way to grow. It’s best to do this experiment on Mung Beans because it’s easy to quickly sprout them, you can purchase them from Amazon https://amzn.to/2u1aVPN
Materials
1. Clear plastic cup
2. Paper towel
3. Mung Beans
4. A bowl
5. Water
Experimental Procedure
1. Pour some water in a bowl and place the mung beans (about a handful) in to soak overnight
2. Take some paper towel and fold it, then use it to line the inside of the cup around the sides. Ball up some more paper towel and stuff it in the cup, leaving you with paper towel all around the sides and in the middle.
3. Pour water in the cup in order to just moisten the paper towel, especially around the edges.
4. Take the beans from overnight and slide them into the sides of the plastic cup. The beans should be between the moist paper towel and the wall of your cup. You should be able to see the beans all around from the outside of the cup (so make sure you use a see-through plastic cup!)
5. Let the cup sit for 3-4 days. Record your results.
4.Keeping Warm This Winter

When winter comes around, animals get ready by eating extra and storing it as body fat. The purpose of this experiment is to test whether having body fat will make a difference in temperature.

Materials
1. An empty Vaseline container or any empty container
2. A full Vaseline container, 13 oz is recommended (Amazon-> https://amzn.to/2J0RDPe)
3. 2 thermometers (some nice ones on Amazon :) --> https://amzn.to/2IXrocx) Experimental Procedure
1. Stick a thermometer in the full Vaseline container and in the empty container
2. In order to make sure the temperatures start off the same, let both containers sit in room temperature for about an hour
3. When the temperatures are the same, put both containers in the freezer for half an hour. Then compare the temperatures on both thermometers
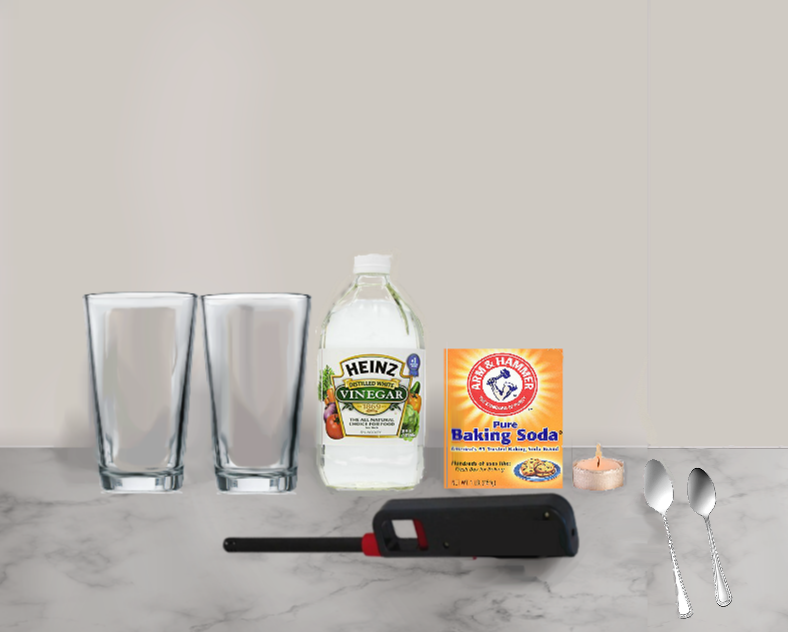
5.Can You Prove CO2 Is Heavier Than Air?
It’s a fact that a flame cant burn without oxygen being present. We want to test to see if carbon dioxide is heavier than air. If it is, it'll sink below the air on to the flame, therefore extinguishing it.
Materials
1. Baking Soda
2. Vinegar
3. Two empty glasses
4. Small candle
5. Matches or the lighter I suggest (https://amzn.to/2uD3ZsA)
6. A teaspoon
7. A tablespoon
Experimental Procedure
1. Start by lighting the candle
2. Drop one teaspoon of baking soda in the first glass
3. Now drop one tablespoon of vinegar in the same glass. Wait for it to fizz
4. After the chemical reaction is over, carbon dioxide should have been formed. Take the first glass and pour the gas into the second glass without pouring any of the liquid.
5. Now there should be carbon dioxide gas in the second glass. Pour the second glass on to the candle flame, record your findings.
6. Carbon Reactions- Frizz Me Up!


The purpose of this experiment is to see which substances with carbon dioxide from soda causes a chemical reaction and blow up the balloon. This experiment will require nine sodas (small 12 oz bottles are recommended), three of any brand. All the materials are conveniently available on Amazon.
Materials
1. 3 Cokes --> https://amzn.to/2ucNT81
2. 3 Sprites --> https://amzn.to/2m0opGY
3. 3 Mountain Dews --> https://amzn.to/2JFjRzp
4. Salt
5. Pepper
6. Baking soda
7. Balloons (nine), 3 of each color is recommended Ex: red, yellow, and blue
https://amzn.to/2zgOj33
8. teaspoon

Experimental Procedure
1. Pick a balloon color to represnt each substance. (FOR EXAMPLE: red balloons will represent salt, yellow for pepper, and blue for baking soda. It all depends on the colors you choose for each substance)
2. Now, make sure you have three balloons per color. (For example: you should have 3 red balloons, 3 yellow, and 3 blue. A total of nine balloons will be used. This is because we want to test an individual salt, pepper, and baking soda reaction each time with Coke, Sprite, and Mountain Dew.)
3. Fill balloons with 1 teaspoon of their substance
4. Take one of each soda brand (one Coke, Sprite, and Mountain Dew)
5. Now you need to take the first substance (salt with red balloons), open one soda at a time and quickly put the balloon over the soda opening. Do this will all three sodas and use all three balloons of the substance.
6. Repeat steps 4 and 5 with the next substance (pepper with yellow balloons)
7. Again repeat steps 4 and 5 with the last substance (baking soda with blue balloons)
8. Observe the balloons and record which balloons experienced a chemical reaction
7. DIY Drink Cooler

Can a wet paper towel help us cool our drink?
This experiment will demonstrate how to cool your drink all by yourself. The idea of cooling your drink is like how humans cool themselves. Like on a hot day, your body will sweat to cool you down. As our sweat evaporates, it takes heat away with it.
Using a wet paper towel around the drink, we will evaporate the water off the paper.
TIP: I recommend recording the water temperature before and after cooling it.
Materials
1. A drink
2. Paper towel
3. Container with water
4. A fan or just a windy day
Experimental Procedure
1. Wrap paper towel all around the drink. Wrap only one layer around
2. Moisten the paper towel all around by dipping it in a container of water
3. Put the bottle in front of a fan. Let it sit in front of the fan’s wind for 30 minutes
8. Transform Old Dull Pennies into Brand New Ones and Make Copper Plated Paper Clips: Chemistry With Paperclips & Pennies
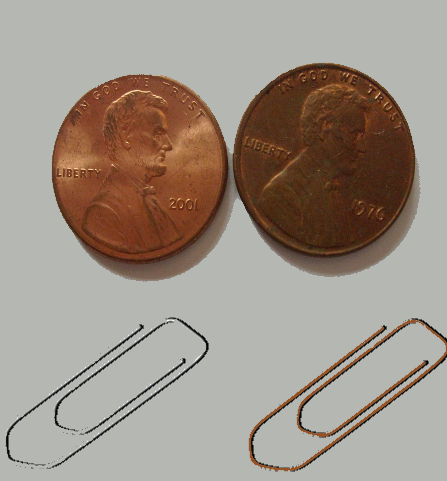
Did you know you can give steel paper clips a copper coating- with a little help from old pennies? Yes, you can! In this experiment you’ll also be transforming those old, dull
pennies into brand new shiny ones!
Some background: Old pennies become dull when the copper outside combines with oxygen in the air, a process which can take years. When you put pennies into the mixture, vinegar and salt will work together and dissolve the copper oxide, which will then become part of the solution. When you put steel paper clips in the solution, some of the iron in the steel dissolves as well. The copper in this solution and the iron that’s left in the paper clip are strongly attracted to each other and so the copper ends up sticking to the paper clips.
Materials
1. White vinegar
2. Table salt
3. A small plastic bowl
4. Paper towels
5. A glass measuring cup
6. A 1-teaspoon measuring spoon
7. 20 or more old pennies that look dull and dark
8. 2 or more new steel paper clips (should be labeled smooth finish or be covered with paint or plastic)
9. water
Experimental Procedure
1. Set aside one penny and paper clip (so we can see how the original penny and paperclip looks without testing on them- so technically they’re our constants because they’ll remain the same)
2. Mix chemicals. In a bowl, stir ¼ cup of vinegar and 1 teaspoon in salt. Be sure NOT to use a metal bowl
3. Place pennies in for 4 to 5 minutes and remove them when they look shiny. Rinse them with water and place them on a paper towel. (If you’d like, you can test to see what happens if you don’t with some)
4. While the pennies dry, put paper clips in the solution. Let them soak till the color changes from silver to copper. It might take an hour or so
5. Rinse paper clips with water and place them on the paper towel to dry
9. Plastic Milk? What Happens If You Combine Milk With Vinegar?

In this experiment, you will discover what you can create by adding vinegar with milk.
Materials
1. Milk
2. Vinegar
3. Bowl
4. Strainer
5. Teaspoon
Experimental Procedure
1. Heat up the milk, but don’t boil
2. Pour the milk into the bowl
3. Add 5 teaspoons of vinegar into the bowl. Mix for a minute
4. Pour milk through a strainer into the sink.
5. Leave whatever is left in the strainer to cool. You could even play around with it and mold it into shapes. It should harden in a few days.
10. Growing Crystals? Which Type Of Crystals Grow The Quickest?
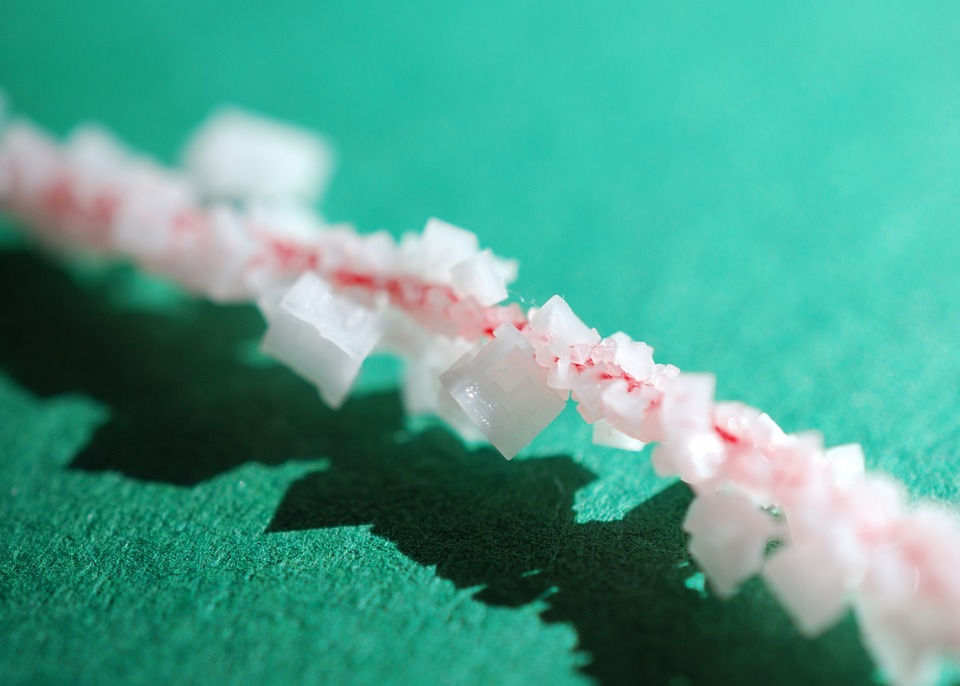
This is a really exciting science fair project idea that kids will enjoy. In this experiment, we will see which substances grow crystals the fastest. This experiment will be using salt, sugar, borax, and alum, all which is available on Amazon. Also, we will be using hot water. Hotter water will dissolve more of the substances. Then afterwards, we will be cooling them. When we cool the substances, it encourages crystal growth. This is because the now denser and cooler mixture will have less room for the dissolved substance that we added, which would then cluster together. Feel free to click the materials to buy whatever you need from Amazon.
Materials
1. Hot water
2. Food coloring
3. Sugar
4. Salt
6. Skewers (optional)
7. String (optional)
8. 4 large glasses or jars, 16 oz is preferred (You have to check out these amazing ones from Ball! https://amzn.to/2u8KnLP)
10. Spoon for mixing
11. Alum
12. Borax
Experimental Procedure
1. Heat the water to boiling over the stove or in an electric kettle
2. Measure 1 cup of boiling water and carefully add it to the first glass
3. Add in borax and stir until no more borax can be dissolved (the goal is to get a saturated solution). You can tell when to stop adding in borax once you notice some of it beginning to settle at the bottom
4. Add in any color of food coloring
5. Let a pipe cleaner hang inside the glass so the crystals have something to form on. TIP: If you want to get some interesting shapes then I recommend coiling the pipe cleaners or twisting them into cool shapes, which means you should already have them prepared before the mixed solutions. You can also tie one end of some string to a stewer then the other end to a pip cleaner, then let the stewer sit on top of the glass’s rim and let the pip cleaner hang from it into the solution.
6. Repeat steps 2-5 with the second glass and sugar
7. Repeat steps 2-5 with the third glass and salt
8. Repeat steps 2-5 with the fourth glass and alum


Comments